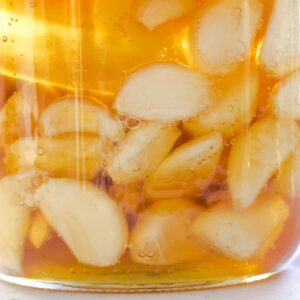
Fermented Garlic Honey
Fermented garlic honey offers a wonderful array of health benefits and is one of the easiest ferments there is to make.
Print
Pin
Servings: 40 people
Calories: 36kcal
Equipment
- 25oz/750ml glass jar
- Glass weights optional
Ingredients
- 12 small heads garlic (see note 1)
- 1 pint raw honey 500ml
Instructions
- Peel all the garlic cloves and cut the bases off that were attached to the root.
- Cut out any bruised bits or discard the whole clove in need.
- Put the peeled garlic cloves into your very clean glass jar and pour the honey over the top. Stop about halfway and give the jar a stir with a clean chopstick to ensure all the cloves are coated. Top up with the remaining honey leaving roughly 5cm (2 inch) headroom. A little more is OK too.
- Be sure you turn the jar a few times every day, as this helps to keep the garlic coated in the honey. The garlic will eventually sink to the bottom of the jar and then there will be no need to keep doing this. You could also use glass weights if you have them.
How to use this fermented garlic honey
- When ready (you'll notice the honey has become much more liquid) - you can take a garlic clove and a spoonful of honey from the jar then eat it as is as a cold and flu remedy. It's great for sore throats this way! Immune-boosting at its best. You can also chop up the garlic cloves and add them to salad dressings with some of the honey or sprinkled over meals if you'd prefer that.
Video
Notes
Note 1: More or fewer garlic cloves and honey may be needed if you're using a different-sized jar.
Note 2: Gases build up during fermentation that can lead to exploding jars. As such, for the first week of fermentation, it’s important to ‘burp’ the jar a few times a day. To do that you simply loosen the lid, then tighten it again. You may hear a pop as you do it, which is just the gas being released. There’s no need to keep doing this after the first week because the fermentation process will become much less active, so fewer gases are formed.
Nutrition
Serving: 1Tbsp | Calories: 36kcal | Carbohydrates: 10g | Protein: 0.1g | Fat: 0.002g | Polyunsaturated Fat: 0.001g | Sodium: 1mg | Potassium: 7mg | Fiber: 0.03g | Sugar: 10g | Vitamin A: 0.03IU | Vitamin C: 0.2mg | Calcium: 1mg | Iron: 0.1mg